> For the complete documentation index, see [llms.txt](https://docs.innova-drilling.com/introduction/llms.txt). Markdown versions of documentation pages are available by appending `.md` to page URLs; this page is available as [Markdown](https://docs.innova-drilling.com/introduction/innova-engineering-how-to-guides/vantage-guides/report-groups-guide.md).
# Report Groups Guide
## 1.0 - Introduction
The Report Groups feature in Innova Vantage allows your organization to set up mailing lists that will automatically send regular reports on your active rigs. The Report Groups interface allows the user to customize each group for different recipients, rigs and report types. This allows your organization to easily provide stakeholders in your projects with regular updates.
## 2.0 - Workflow
Follow the steps below to create a new Report Group.
1. Click on the burger menu icon in the top left of your screen to open the main menu. Navigate to **Groups >> Report Groups.**

2. The Report Groups modal displays existing report groups. Click on one to display options on the menu ribbon:
1. **Edit:** Allows the user to customise the settings for the report group.
2. **Delete:** Removes the report group.
3. **Test:** Manually sends a report email to the designated recipients, allowing the user to verify the setup of the report group.

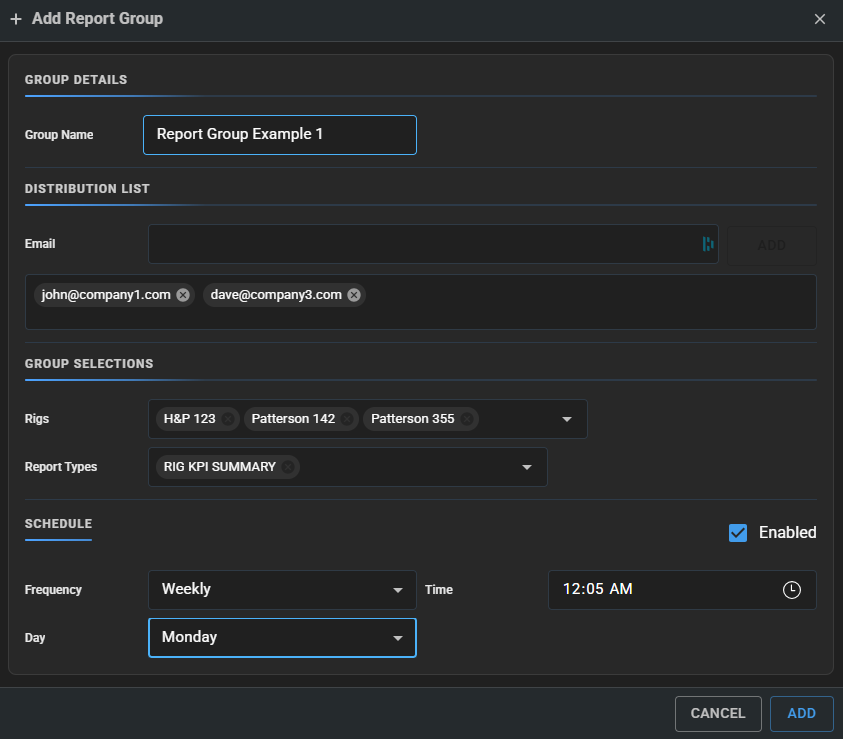
3. Click on **Add Group** to create a new group and open the Add Report Group modal.
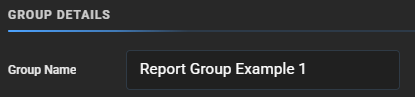
4. Give your group a descriptive name in the **Group Name** field.
5. In the **Distribution List** section, add people to the mailing list by entering each email into the **Email** field and clicking the **Add** button.
1. The emails entered here can be any valid email address. **They do not need to be members of your organisation.**
2. Multiple emails can be entered at once by separating them with a semi-colon. E.g. <_email1@company1.com>; .\_

6. In the **Group Selections** section, choose the reports that you wish to send using the **Report Types** dropdown. Choose the desired rigs from the **Rigs** dropdown. When it is time to send the reports, Vantage will use **active wells** under the selected rigs as the data source. If there are NO active wells in the database for a selected rig then no report will be included for that rig.
1. **Note: Reports sent using this method will use the default unit set for your organization.**

7. In the **Schedule** section choose how often you want the report email to be sent – either daily, weekly or monthly – using the **Frequency** dropdown. Use the **Time** field to set what time of day you wish the email to be sent.
1. **Note: The Time field references your local PC time zone.**

8. Selecting the **Enabled** checkbox activates the schedule, ensuring the report cycle is turned on. This option can be toggled off to pause the report email without needing to delete the report group. Then click on **Add** to save the new report group.

9. The report group will now start to automatically send the report email at the scheduled frequency and time.
## 3.0 - Report
Recipients on your mailing list will receive an email from that will look like the below. If recipients do not receive the email, check their spam folders.

Currently, the available report is the Rig KPI Summary Report. This report includes:
* 24 hour summary and lookahead.
* 24 hour drilling KPI summary.
* Depth v Days and Depth v Cost charts.
* Activity Distribution chart.
* Tripping Speed and Connection Speed charts.
* NPT summary.
**Note: The report details the previous 24 hours activity, using a midnight-to-midnight format.** **I.E.,** **If the report is sent** **on a Tuesday, it will detail the activity between 00:00 – 24:00 on Monday.**

---
# Agent Instructions
This documentation is published with GitBook. GitBook is the documentation platform designed so that both humans and AI agents can read, navigate, and reason over technical content effectively. Learn more at gitbook.com.
## Querying This Documentation
If you need additional information that is not directly available in this page, you can query the documentation by asking a question.
Perform an HTTP GET request on the following URL with the `ask` and `goal` query parameters:
```
GET https://docs.innova-drilling.com/introduction/innova-engineering-how-to-guides/vantage-guides/report-groups-guide.md?ask=&goal=
```
`ask` is the immediate question: it should be specific, self-contained, and written in natural language.
`goal` is what the user is ultimately trying to achieve, the reason they need the answer. Sharing it helps GitBook give you a better, more relevant answer. A goal is most helpful when it describes the outcome the user wants rather than restating the question. For example, with `ask=how do I create an API token`, a goal like `automate deployments from our CI pipeline` lets GitBook tailor the answer to that use case.
The response will contain a direct answer to the question and relevant excerpts and sources from the documentation.
Use this mechanism when the answer is not explicitly present in the current page, you need clarification or additional context, or you want to retrieve related documentation sections.